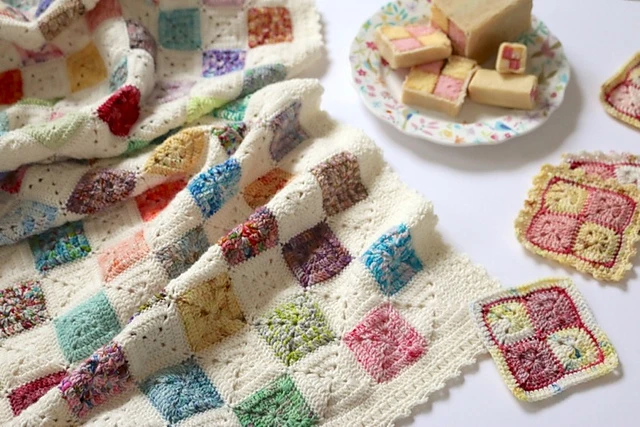
Battenberg Blanket
Crocheting is a wonderful hobby that can help to relax and create beautiful items at the same time. One such item that can be created using crochet is the Battenberg Blanket. This type of blanket is named after the famous cake that is said to have originated in Germany.
The Battenberg Blanket is a beautiful, colorful and cozy blanket that is perfect for snuggling up in on cold winter nights. In this article, we will take you through the steps involved in crocheting a Battenberg Blanket.
Materials Needed:
- Worsted weight yarn in at least two different colors (white and pink in this example)
- Crochet hook (size I/5.5mm)
- Scissors
- Tapestry needle
Step 1: Start by creating a foundation chain of multiples of 8 stitches. For a small blanket, 96 chains should suffice, for a larger blanket, you can increase the number of chains accordingly.
Step 2: Once you have your foundation chain, turn your work and begin crocheting in the second chain from the hook.
Step 3: In this row, you will create a pattern of single crochets (SC) and double crochets (DC). Start by doing one SC in the second chain from the hook, then do one DC in the next chain, then one SC in the next chain, then one DC in the next chain. Continue this pattern until the end of the row.
Step 4: When you reach the end of the row, chain one and turn your work.
Step 5: In this row, you will be doing the opposite of what you did in the previous row. So, where you did a SC in the previous row, you will now do a DC, and where you did a DC, you will now do a SC. Continue this pattern until the end of the row.
Step 6: When you reach the end of the row, chain one and turn your work.
Step 7: For the next few rows, you will be alternating between the patterns of row 3 and row 5.
Step 8: After completing a few rows of the alternating pattern, it is time to introduce the second color. In this example, we will be introducing the pink color. To do this, simply attach the new color by tying a knot to the end of the first color and continue with the pattern in the new color.
Step 9: Continue alternating between the two colors for a few rows, making sure to carry the unused color up the side of the work.
Step 10: When you reach the desired length for your blanket, finish it off by creating a border. In this example, we will be doing a simple SC border all around the blanket. Start by chaining one and doing one SC in each stitch along the edge of the blanket, making sure to do three SC in each corner stitch to help the corners lay flat.
Step 11: Once you have completed the border, weave in any loose ends using a tapestry needle.
In conclusion, crocheting a Battenberg Blanket is a fun and relatively simple project that can be enjoyed by crocheters of all skill levels. By following the steps outlined in this article, you will be able to create a beautiful and cozy blanket that you can enjoy for years to come. So, grab your yarn and crochet hook, and start creating your own Battenberg Blanket today!
Access the free crochet pattern here.
And if you liked this pattern, but still want to see some more options of models of the most different crochet projects, below I will leave other free options for you to view:
It is with great respect to all our followers that the blog We Love Crochet Patterns wishes you all an excellent week, full of God’s blessings in your homes, much peace, joy, harmony, and especially many, many threads to start more a crochet yarn craft project.
With love and affection, We Love Crochet Patterns!